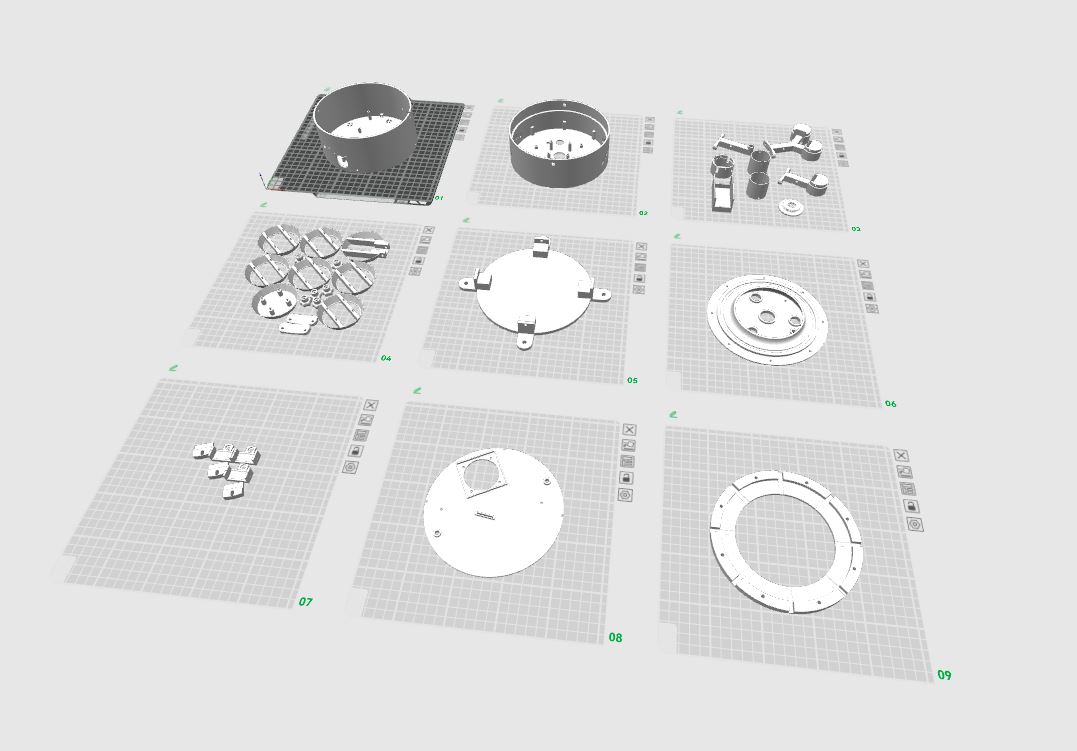
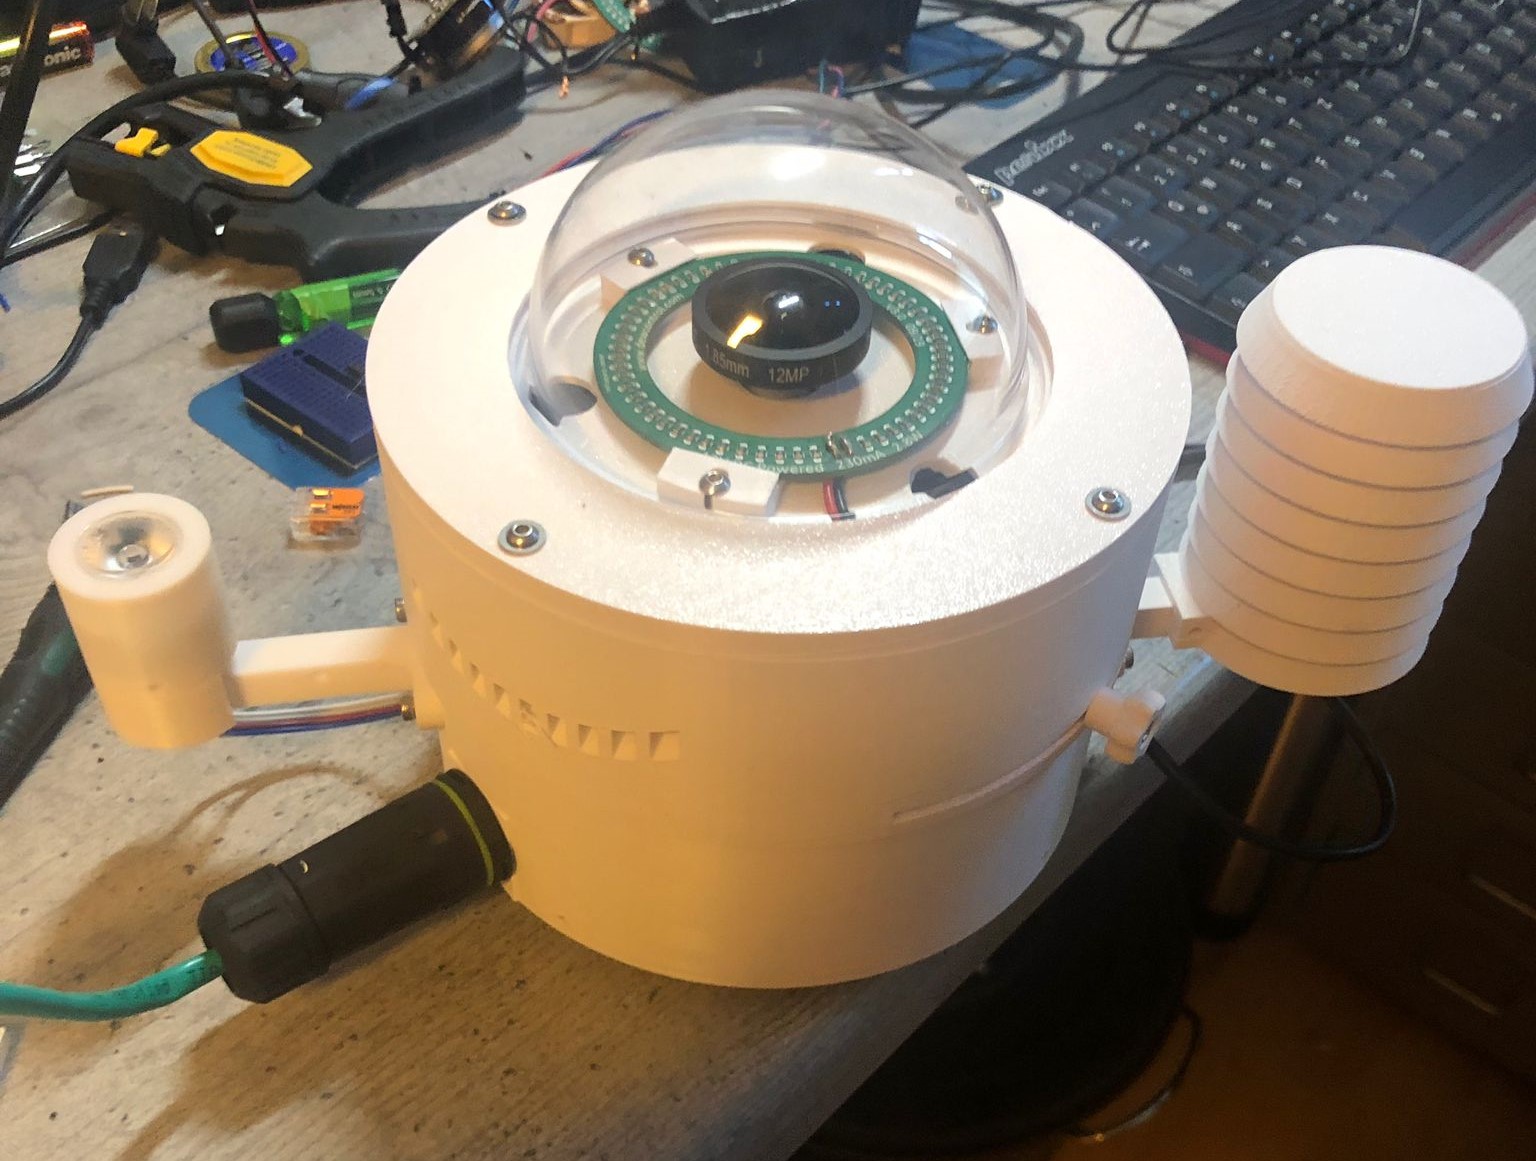
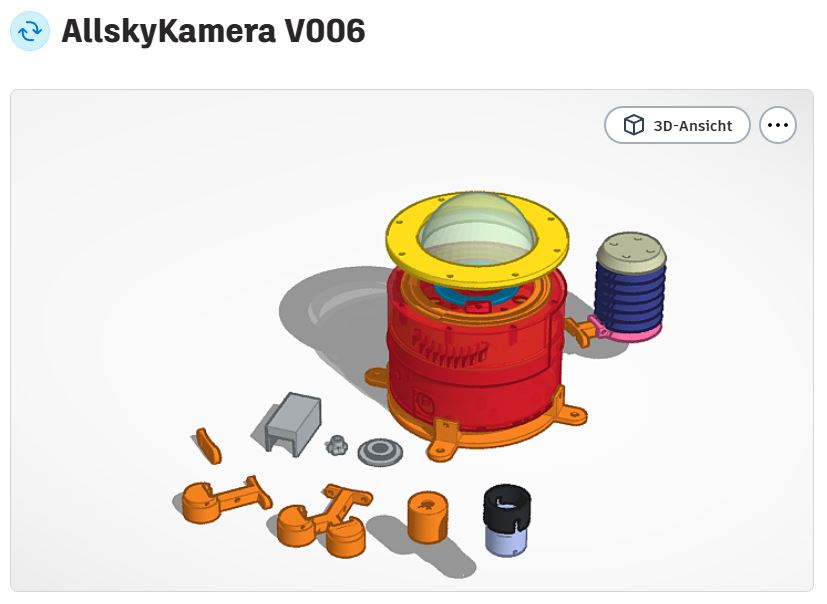
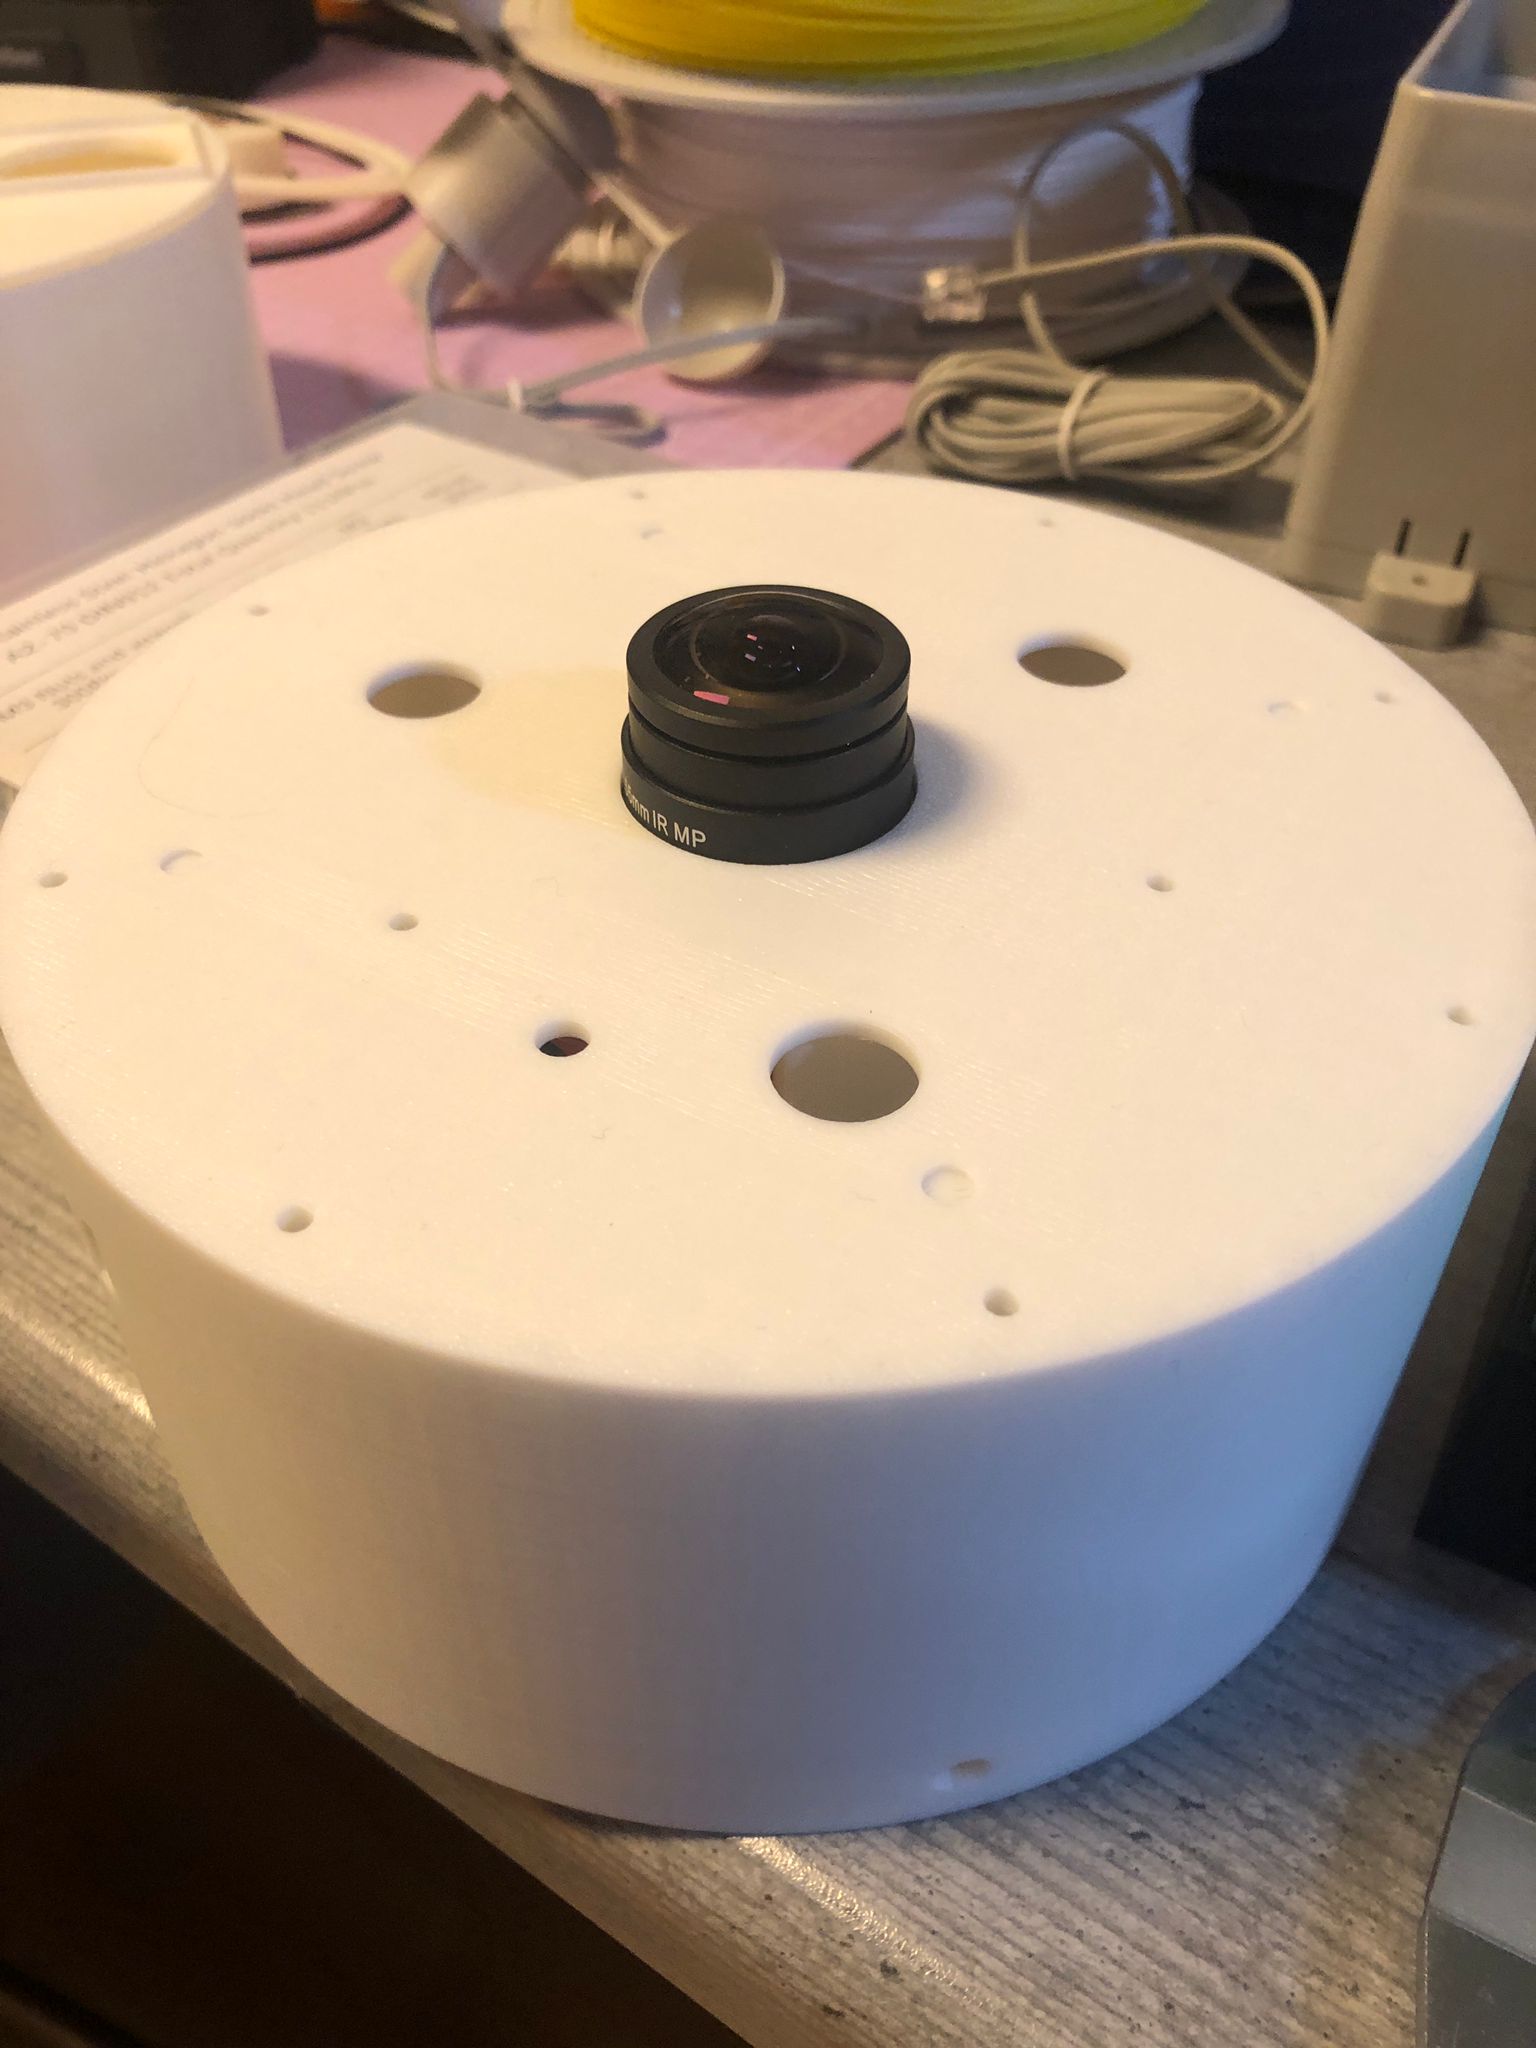
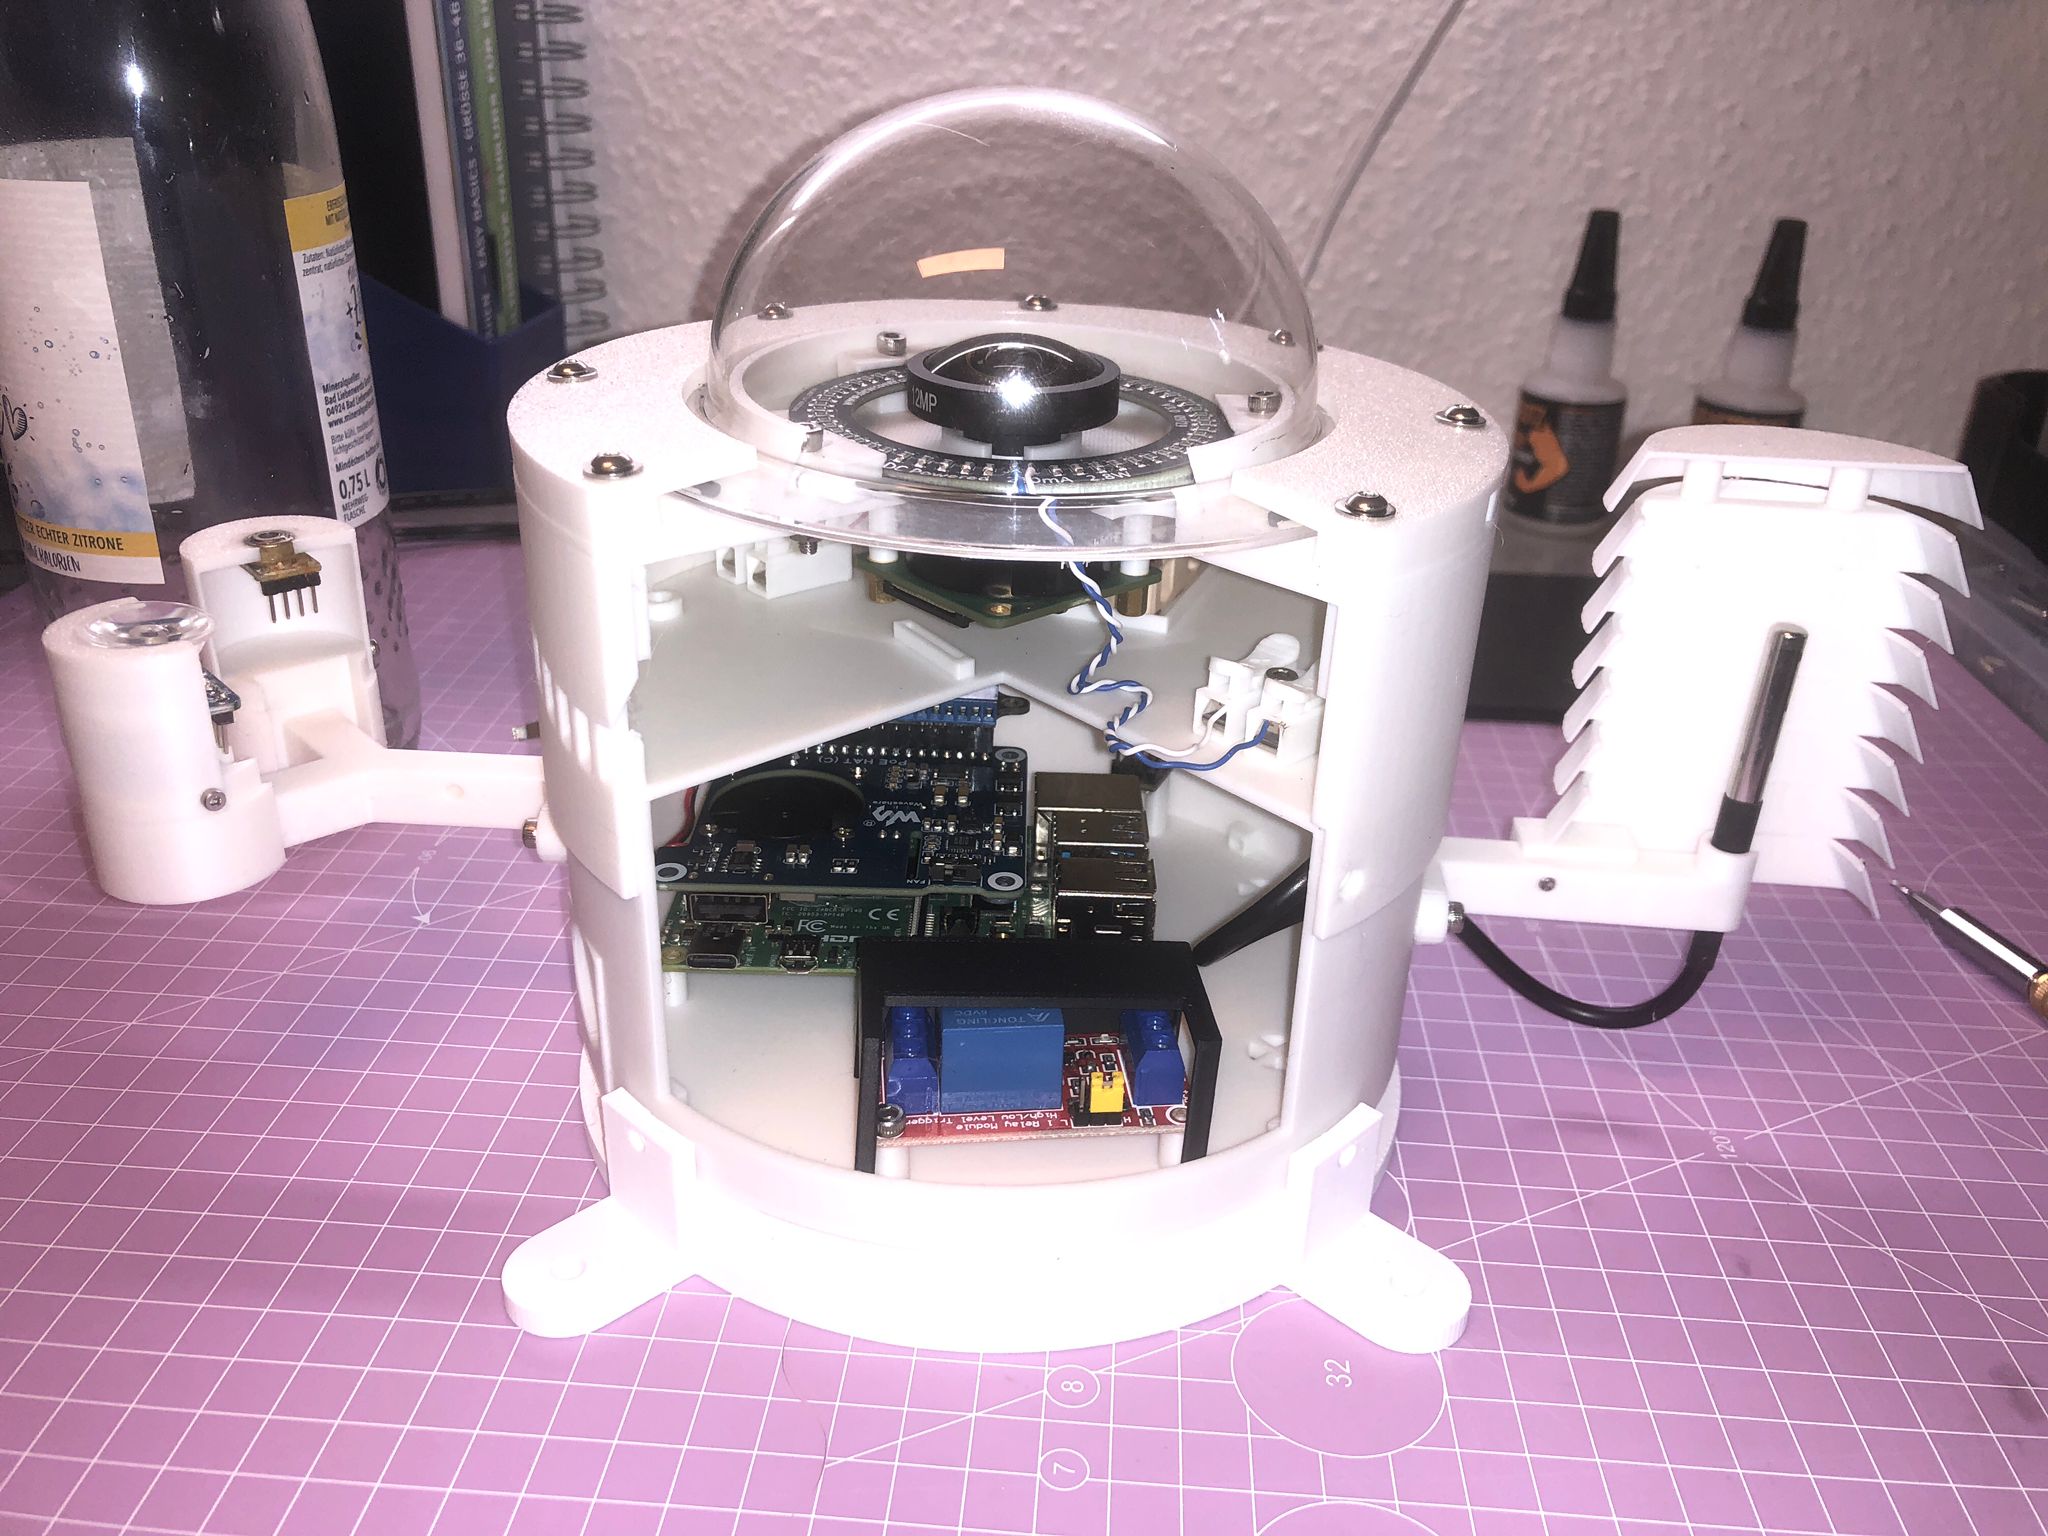
🧩 Housing & Dome

Here you’ll find my housing design, downloads (ZIP/STL), and practical notes on the dome, seals, and print setup.

All parts are based on my own build approach — feel free to use it as a baseline and adapt details to your location.
Quick overview
  • Download models & STL files
  • Notes on dome, O-ring & water tightness
  • Print settings per component

🏗️ Housing & design

Jump

Models, renderings and downloads for the case — plus what each part does and what to watch out for when printing.

🫧 Dome, seals & dew

Jump

The dome is your “front window” — sealing, fit and dew management are critical for stable operation.

🏗️ Housing

The case is designed so Raspberry Pi, camera, PoE, fan, relay and sensors can be mounted cleanly — with wiring that stays understandable.
Tip: test everything as an open prototype first, then move it into the case.

Makerworld project
Makerworld project with multiple print profiles
Camera assembly
Camera housing with mounted components
TinkerCAD assembly
TinkerCAD model of the AllSkyKamera
ZWO ASI camera case
ZWO ASI camera case
Changes in the ZIP archive (V008):
  • Camera head improved with dew drip-off
  • Clamping ring with improved water drainage
  • *new adapter for 22mm heating resistors
  • *new cover plate revised with water stop
  • Intermediate plate improved
  • Einbaurichtung für Zwischenplatte eingearbeitet

🫧 Dome & sealing

For good images you need: a clear dome, reliable sealing and as little fog/dew as possible. Use the right O-ring and a heater.
Tight sealing + less dew = stable operation

Acrylic dome + O-ring
Ensure proper fit, even pressure on the O-ring and a smooth sealing surface. Even a small leak can quickly bring moisture inside.
Reduce dew / fogging
A dew heater ring or 12V resistors can reduce fogging significantly. Important: switch via relay and wire it properly.
If you see fogging: first check O-ring/fit and whether the heater switches correctly.
🧵
3D printing notes
All housing parts are printed in ASA or PETG. PETG works, but ASA is usually the better choice for long-term outdoor use.
ASA (recommended)
ASA is UV resistant and more temperature stable — ideal for permanent outdoor use (sun, frost, summer heat).
PETG (possible)
PETG is easier to print and very durable. It works outdoors, but may age faster under strong UV and heat exposure.
Tip: print critical exterior parts in ASA. PETG is often fine for prototyping and interior components.
AllSkyCamera demonstrator (prototype without housing)
Demonstrator: prototype setup to test wiring, sensors, and the Raspberry Pi before the final assembly.
📘
Assembly documentation (PDF)

A detailed assembly and mounting guide for version V006 is available as a PDF. It covers the mechanical build, component placement, and practical notes from real-world use.

Open V006 assembly guide (PDF)

🧭 Next steps

Once the housing is ready, you can test the installation or jump straight into sensors.

Notice: All 3D models and STL files on this page are licensed under CC-BY-3.0-NC (attribution, non-commercial use).
← Overview Installation →